Simulation
EnergyPlus
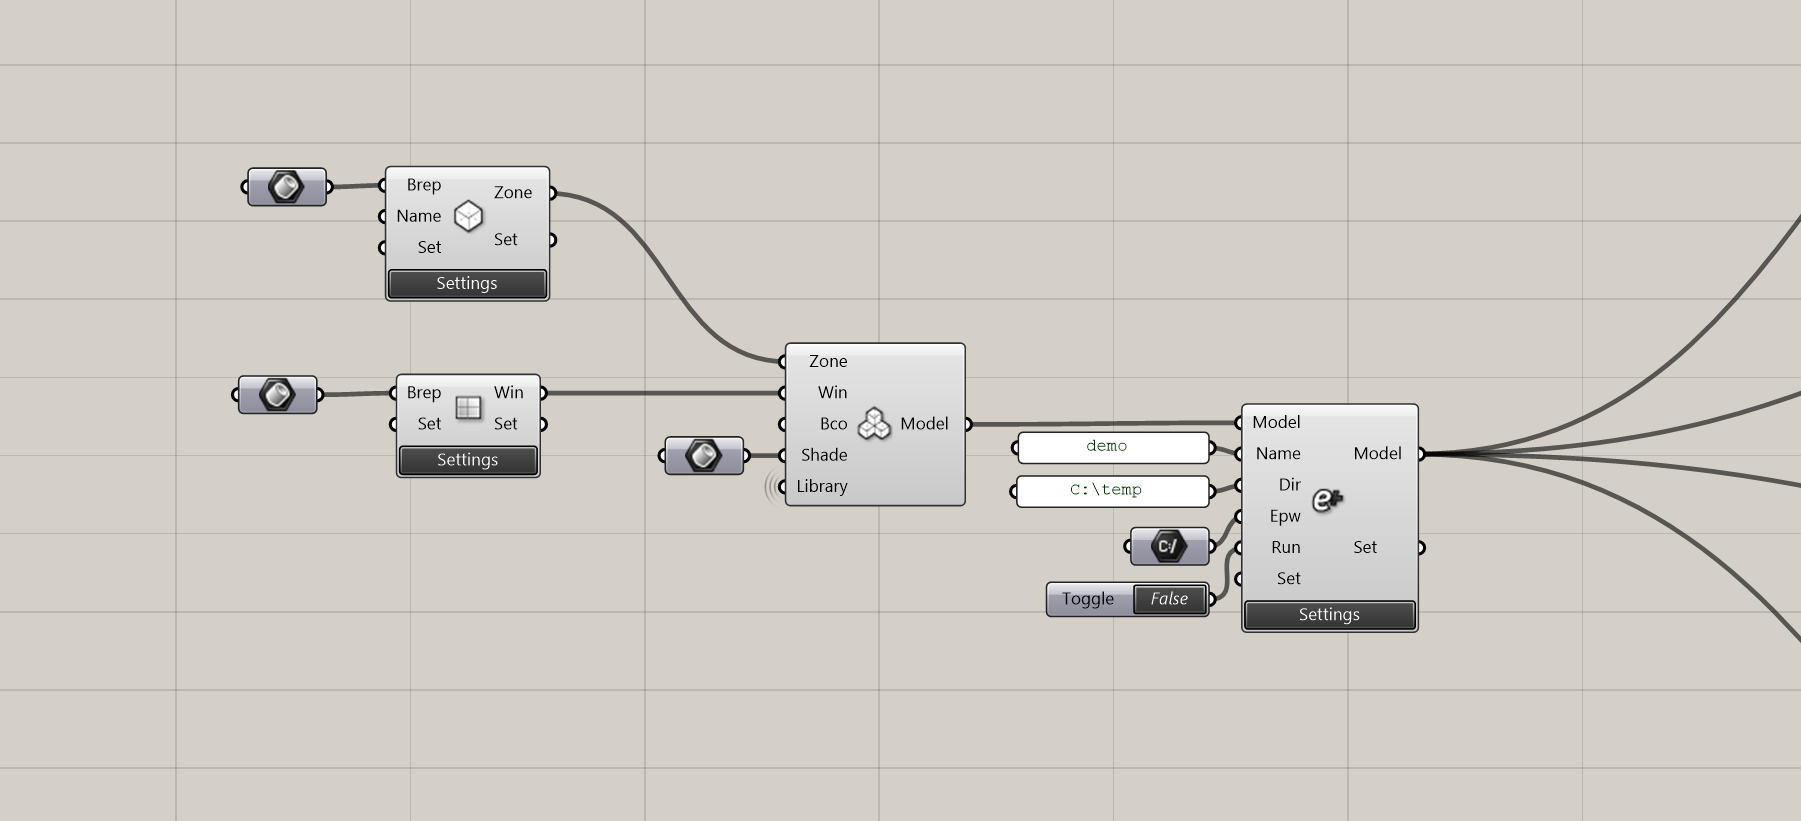
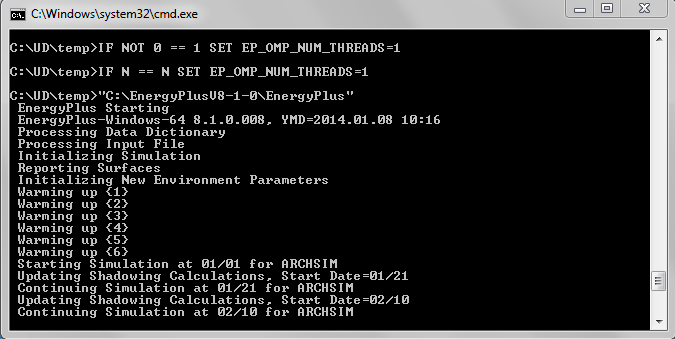
The output of the Zone Connectivity Network component is a complete thermal model that holds all zones and shading geometry and the various settings. The thermal model is ready to be exported to the EnergyPlus simulation engine. This is done with the EnergyPlus component. The first input is the thermal model from the Networker. You also have to provide a name [NAME] for the simulation (no white spaces and line breaks and other strange characters such as %$#@!&*()+) and a working directory under [DIR]. Text panels are the best way to provide this information. Make sure that you do not accidentally enter a line break by hitting enter to close the text input box. The directory and the name determine where the EnergyPlus input file (IDF), all the results and error protocols will be generated. Further, a weather file (EPW format) must be specified. The file path component allows you to set a file path to any EPW file on your computer. The last required input is a true/false toggle. You may use a toggle as shown in the figure above or a button. In case everything is set up correctly and you set the true/false toggle to true a console window will pop up and the EnergyPlus simulation is executed. You should you see that the simulation is warming up and then starts moving through the months as shown in the figure below.

Energy Plus component

Energy Plus DOS box
EnergyPlus simulation settings
Under the settings button of the EnergyPlus component additional adjustments can be made to the simulation. More specifically a Simulation, Outputs and Advanced settings tab are provided. The Simulation tab allows you to adjust the run period of the simulation. Further, an array of ground temperatures can be provided. The last settings box allows you to switch your model to an airflow network simulation. Airflow networks are an advanced way to simulate natural ventilation. For further information see the Airflow Network section further below.
The Outputs tab allows you to request different output variables. Further, the temporal resolution can be defined. By default “Monthly” results are generated. “Hourly”, “Daily” and “Annual” results can also be provided.
In the Advanced Settings tab several EnergyPlus specific settings can be provided to change the solar distribution algorithm, shadow calculation frequency, conduction heat transfer algorithms and simulation time steps. For detail refer to the EnergyPlus InputOutputReference. The InputOutputReference.pdf is located in your EnergyPlus installation directory. The last settings box allow you to alter the file path to the EnergyPlus installation. Note that older and newer EnergyPlus version may or may not work. Try at your own risk.
Screen shot of the Outputs tab. Adjust runtime, simulation resolution and the request output variables.
Screen shot of the Advanced settings tab.